What to Expect During Professional Mold Remediation: A Step-by-Step Guide
If you have never been through a professional mold remediation, the process can seem mysterious and intimidating. Will it involve tearing out walls? How long will you be displaced? What will it cost? Understanding the complete process from start to finish removes the uncertainty and helps you prepare. Here is exactly what to expect when you hire a professional mold remediation company.
Timeline at a Glance
Small job (single wall, small bathroom): 1–2 days
Medium job (one room, crawlspace treatment): 3–5 days
Large job (multiple rooms, structural repairs): 1–2 weeks
Whole-house remediation: 2–4 weeks or longer
Step 1: Initial Inspection and Assessment
The process begins with a thorough inspection of your property. A certified technician will walk through the entire home, not just the area where mold is visible. They will use moisture meters to check walls, floors, and ceilings for hidden moisture. Thermal imaging cameras may be used to detect temperature differences that indicate wet areas behind walls or above ceilings. If mold is suspected but not visible, air sampling may be performed to capture airborne spores, or surface samples may be taken from suspicious areas using tape lifts or swabs.
The technician will also investigate the moisture source. Without identifying and correcting what fed the mold, any remediation is temporary. They will check plumbing fixtures, roof condition, window seals, foundation walls, HVAC systems, and humidity levels. You will receive a detailed written report describing the findings, including the type and extent of mold, the affected areas, the moisture source, and a recommended scope of work with an itemized cost estimate. This phase typically takes 1–2 hours for a standard residential property.
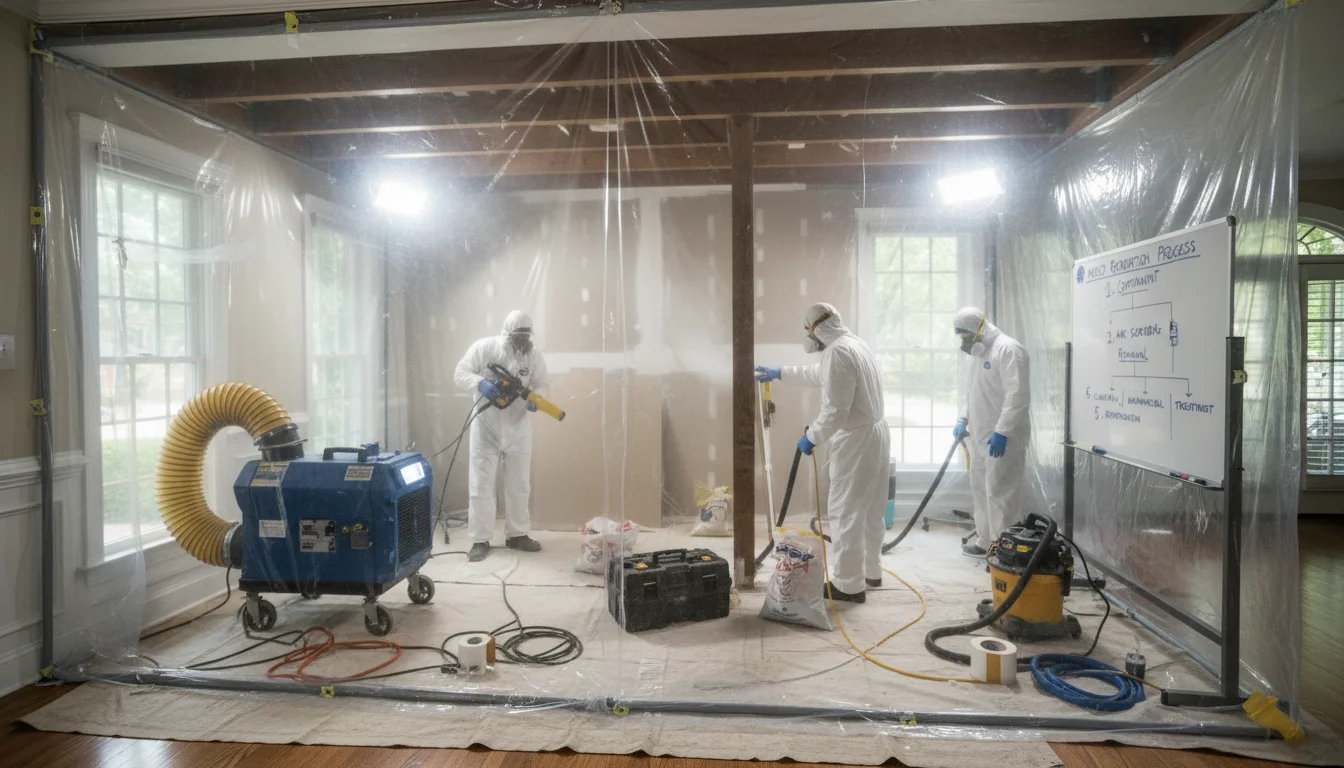
Step 2: Containment Setup
Containment is one of the most critical steps in the remediation process, and it is what distinguishes professional remediation from DIY cleanup. The goal is to isolate the contaminated area so that mold spores released during the removal process do not spread to clean areas of the home. Technicians will seal off the work area using heavy-gauge (6-mil) polyethylene sheeting from floor to ceiling, creating a sealed enclosure around the affected space. All seams are taped, and zippered entry points are installed so workers can enter and exit without breaking containment.
Negative air pressure is then established inside the containment. HEPA-filtered negative air machines pull air from inside the containment, filter it through HEPA filters that capture 99.97% of particles down to 0.3 microns, and exhaust the clean air outside the home through a window or other exterior opening. This creates lower air pressure inside the containment than in the surrounding rooms, so air always flows into the containment rather than out of it whenever the zippered entry is opened. Any HVAC registers in the work area are sealed to prevent the system from circulating spores through ductwork. This setup is typically completed in 2–4 hours on the first day of remediation.
Step 3: Air Filtration
Before demolition or cleaning begins, HEPA air scrubbers are placed inside the containment to begin removing airborne mold spores. These are separate from the negative air machines and are designed to filter and recirculate the air within the contained space, gradually reducing the spore count in the air. This step reduces the amount of airborne mold that workers will be exposed to and that might settle on surfaces. Air filtration continues throughout the remediation process and for at least 24 hours after all visible mold has been removed.
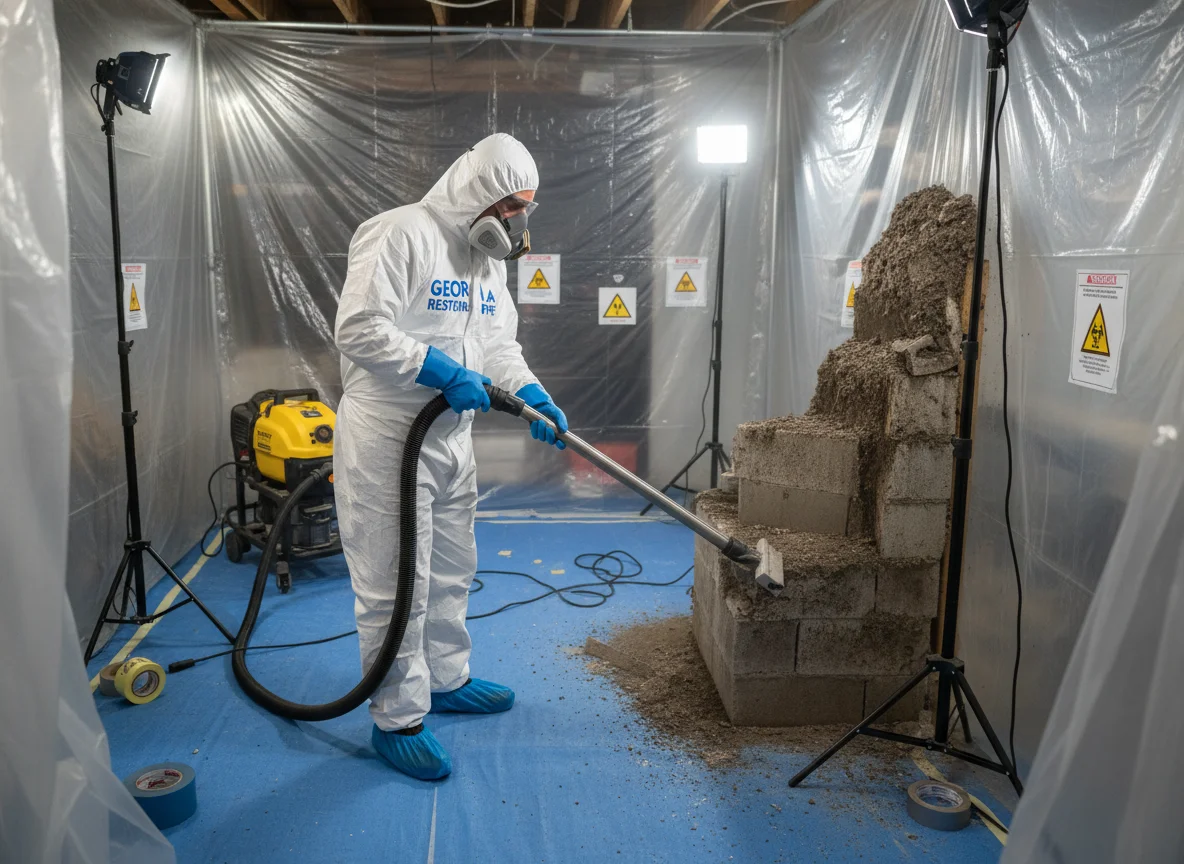
Step 4: Mold Removal and Cleaning
This is the core of the remediation process. The specific methods depend on the surfaces involved and the extent of contamination. For non-porous surfaces like metal, glass, and hard plastic, technicians use HEPA-filtered vacuums to remove loose spores and then wipe surfaces with antimicrobial cleaning solutions. These surfaces can typically be fully cleaned and salvaged. For semi-porous surfaces like wood framing studs and concrete, technicians may use wire brushing, sanding, or media blasting (soda or dry ice) to remove mold that has penetrated the surface, followed by HEPA vacuuming and antimicrobial treatment. For porous materials like drywall, insulation, carpet, ceiling tiles, and upholstered furniture, these materials almost always must be removed and discarded. Mold penetrates deeply into these materials, and no amount of surface cleaning can fully remove it. Technicians will cut out affected sections of drywall, bag the debris inside the containment, and carry it out through the designated exit route for proper disposal.
Step 5: Damaged Material Removal and Disposal
Any building materials that are water-damaged or mold-contaminated beyond the point of salvage are removed, double-bagged in heavy-duty polyethylene bags while still inside the containment, wiped down on the exterior of the bags, and carried out of the home through the shortest, most direct route. They are disposed of as construction debris at an approved landfill. This step can be the most disruptive part of the process, as it may involve removing sections of drywall, pulling up flooring, or cutting out sections of subfloor. Your remediation company should explain exactly what will be removed during the estimate phase, but be prepared for the discovery of additional hidden damage once walls or flooring are opened up — this is common and your contractor should have a process for communicating these findings and obtaining approval for additional work.
Step 6: Cleaning and Sanitization
After all contaminated materials have been removed and all remaining surfaces have been physically cleaned, the entire contained area receives a thorough sanitization. All surfaces, including walls, floors, exposed framing, and any items that remained in the containment, are HEPA-vacuumed and wiped with EPA-registered antimicrobial solutions. This step addresses microscopic spores that may have settled on surfaces during the demolition and removal process. Technicians work methodically from the ceiling down to the floors, and from the farthest point in the containment back toward the exit, to avoid re-contaminating cleaned areas. A fogging treatment with an EPA-registered biocide may be applied as a final step to reach spores in small cracks and crevices that physical cleaning might have missed.
Step 7: Drying
If the mold was caused by active moisture intrusion, the affected area must be thoroughly dried before any reconstruction can begin. Industrial dehumidifiers and high-velocity air movers are placed in the area and run continuously for 24–72 hours, depending on the extent of moisture. Technicians monitor moisture levels daily using moisture meters, and drying continues until wood and other structural materials reach their target moisture content, typically below 16% for framing lumber in Georgia's climate. Reconstruction or finishing work should never begin until drying is complete, as trapping moisture behind new materials will simply restart the mold cycle.
Step 8: Post-Remediation Inspection and Testing
After cleaning and drying are complete and the HEPA air scrubbers have run for at least 24 hours, post-remediation verification testing is performed. This is typically done by an independent third-party inspector or by the remediation company using an independent laboratory for sample analysis. The testing includes: visual inspection to confirm no visible mold remains, air sampling inside the containment compared to an outdoor baseline sample, and surface sampling of remediated areas using tape lifts or swabs. The goal is to demonstrate that indoor mold spore counts are similar to or lower than outdoor levels, that the specific mold types found in the original assessment are no longer present at elevated levels, and that surfaces are free of mold residue.
If post-remediation testing shows acceptable results, the containment can be removed and the project transitions to reconstruction if needed. If results are not acceptable, additional cleaning is performed and re-tested until clearance is achieved. A detailed report documenting the clearance results should be provided to you for your records. This report is valuable for insurance documentation, real estate disclosure purposes, and your own peace of mind.
What Homeowners Should Do to Prepare
Before remediation begins, you can take several steps to make the process smoother. Clear a path from the entry door to the work area so technicians can move equipment and debris without navigating furniture or personal items. Remove or cover valuable items in adjacent rooms, even though those rooms will be outside the containment, as a precaution. Make arrangements for pets — the noise of air movers, dehumidifiers, and air scrubbers can be stressful for animals, and the work area is hazardous to their health. Plan for disruption to your routine. During active remediation, you may not have access to the contained area, which could mean losing use of a bathroom, kitchen, or bedroom. Discuss with the remediation company whether you can remain in the home during the work or whether temporary relocation is recommended. For small to medium jobs, most families can stay in the home, avoiding the contained area. For large-scale remediation, especially if the HVAC system is involved or multiple rooms are affected, temporary relocation may be the better choice.
Post-Remediation: Preventing Recurrence
Professional remediation removes the mold that is present, but it does not prevent new mold from growing if the underlying moisture conditions are not addressed. After remediation is complete and the area is reconstructed, focus on prevention: fix the moisture source that caused the original problem, whether it was a leak, condensation, or high humidity. Install a dehumidifier in any area that tends toward high humidity, particularly basements and crawlspaces. Have your HVAC system inspected and serviced to ensure it is properly dehumidifying. Check your home regularly for any signs of moisture: water stains on ceilings, musty odors, condensation on windows, or warped flooring. In Georgia's climate, maintaining interior relative humidity below 55% is a year-round commitment that pays dividends in preventing mold recurrence.
Common Questions About the Process
Will my homeowners insurance cover remediation?
Coverage depends on the cause of the mold. If the mold resulted from a sudden, accidental water event covered by your policy (burst pipe, storm damage, appliance overflow), remediation may be covered. Mold from long-term humidity or deferred maintenance is generally not covered. Review your policy or speak with your agent before remediation begins so you understand your coverage. A remediation company experienced with insurance claims can help you document the damage and communicate with your adjuster.
Do I need to be home during remediation?
You do not need to be present for the actual work, and for health reasons, you should avoid the contained work area entirely. You do need to be available for access to the home at the start of each workday and for periodic communication about progress and any discoveries. Most remediation companies will provide daily updates by phone or text.
What about my belongings in the affected area?
Non-porous items (metal, glass, hard plastic) can usually be cleaned and kept. Porous items (upholstered furniture, mattresses, books, papers, fabrics) that have been exposed to mold or moisture may need to be discarded, especially if they show visible mold growth. Your remediation company can advise on a case-by-case basis, and some items may be restorable through specialized content cleaning services.
Related Resources
- Black Mold Exposure Symptoms: What to Know
- How to Choose a Mold Removal Company in Gainesville
- DIY vs. Professional Mold Removal: Cost Guide
- Mold Removal in Hall County: Complete Guide
Ready to Start Your Mold Remediation Project?
Call Mold Remediation Hotline at (332) 220-0303 for a free inspection and detailed estimate. We walk you through every step.