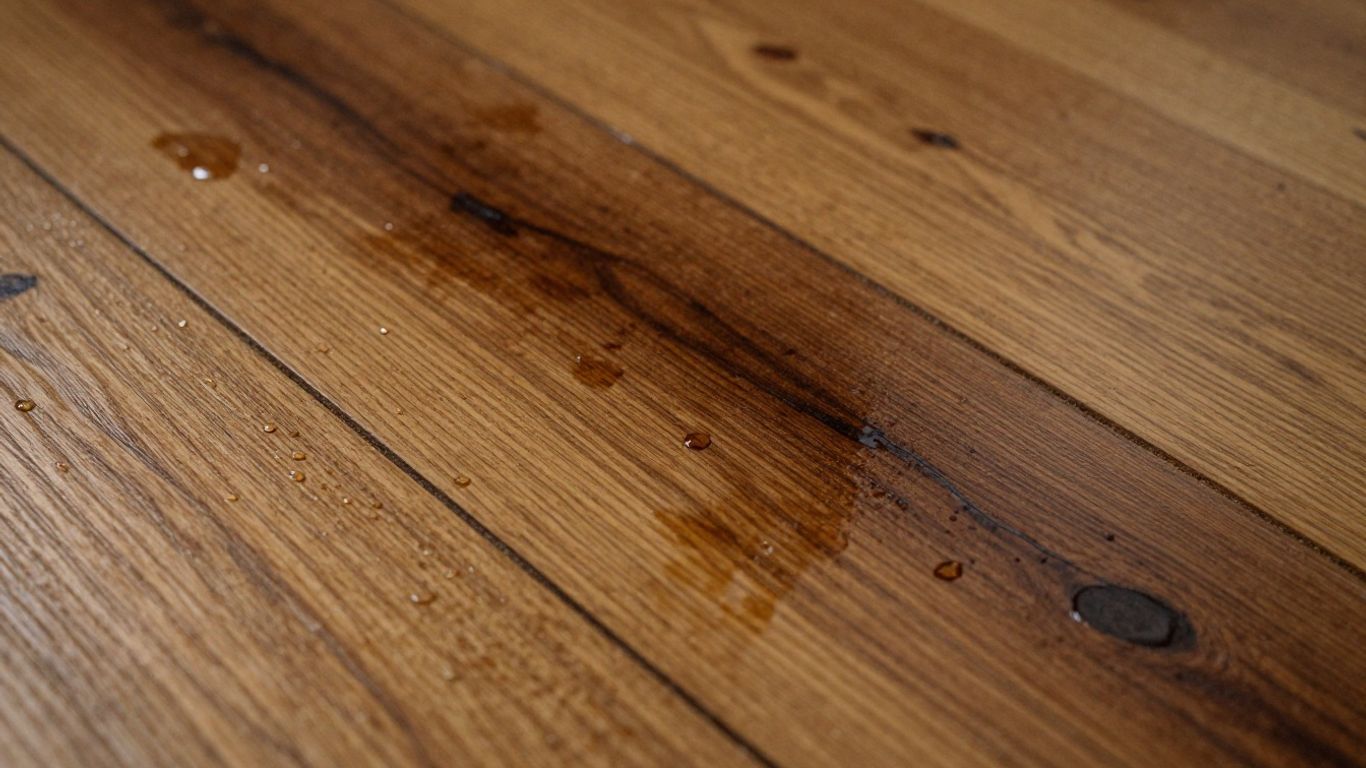
So, you’ve found water on your hardwood floors. Ugh. It’s one of those things that can make your stomach drop, right? Whether it was a leaky pipe, a forgotten spill, or something else entirely, dealing with water damage on wood floors can feel overwhelming. But don’t panic just yet. Knowing what to do, and how fast to do it, can make a huge difference in whether you’re looking at a simple fix or a full floor replacement. This guide will walk you through how to fix water damage on hardwood floor, from the immediate steps to take to understanding when it’s time to call in the pros.
Key Takeaways
- Acting fast is super important. The sooner you deal with the water, the less damage your hardwood floor will likely suffer.
- Get rid of any standing water right away. Use things like wet vacuums, mops, and towels to soak it all up.
- Drying the area completely is the next big step. Use fans and dehumidifiers to pull out all the moisture, even what’s hidden.
- Figure out if the damage is something you can fix yourself or if you need a professional. Things like mold or really bad warping usually mean you need an expert.
- Preventing future problems is key. Keep an eye out for leaks, manage your home’s humidity, and clean up spills quickly.
Immediate Actions To Mitigate Water Damage
When water decides to pay your hardwood floors an unwelcome visit, time is absolutely of the essence. The first 24 hours are your golden window to prevent minor issues from turning into major headaches. Think of it like this: the longer that water sits, the more it soaks into the wood, leading to swelling, warping, and eventually, mold. So, let’s get straight to it.
Stopping the Source of the Water
This might sound obvious, but you’d be surprised how often people skip this step. Before you do anything else, you have to find out where the water is coming from and shut it off. Is it a leaky pipe under the sink? An overflowing toilet? A washing machine hose that decided to give up the ghost? Whatever it is, stop the flow. This is the single most important step to prevent further damage. If you can’t find or stop the source yourself, don’t hesitate to call a plumber or the appropriate service.
Removing Standing Water
Once the water source is dealt with, it’s time to get rid of any puddles or standing water. A wet-dry vacuum is your best friend here; it can suck up water much faster and more effectively than a mop. If you don’t have one, grab every towel and mop you own and start soaking it up. Don’t forget to get into the corners and along the baseboards where water likes to hide. You want to remove as much surface water as possible, as quickly as possible. This is a critical step to limit further damage to your hardwood floors [e464].
Enhancing Air Circulation and Drying
Now that the bulk of the water is gone, the real drying process begins. You need to get air moving. Open up windows and doors if the weather outside is dry and not too humid. If it’s humid out, keep them closed and rely on your indoor climate control. Bring in fans – lots of them. Position them to blow air across the wet floor. Dehumidifiers are also incredibly helpful here; they pull moisture right out of the air, which in turn helps draw moisture out of the wood. Keep these running continuously. Removing wet rugs and furniture from the area is also a good idea, as they can trap moisture against the floor.
Documenting Damage for Insurance
This is a step that many people overlook in the panic, but it’s super important if you plan on filing an insurance claim. Start taking pictures and videos of the water damage as soon as you discover it. Capture the source of the water, the extent of the flooding, and any visible damage to the floor. The more documentation you have, the smoother your insurance process will likely be. Keep records of any expenses you incur during the mitigation process, too.
Remember, the speed at which you act can significantly impact the outcome. Don’t delay in addressing the water, removing it, and starting the drying process. Prompt mold cleanup is also vital if any dampness lingers [174b].
Here’s a quick rundown of what to focus on:
- Stop the water source: Find it and shut it off immediately.
- Remove standing water: Use a wet-dry vac, mops, and towels.
- Increase air circulation: Deploy fans and dehumidifiers.
- Document everything: Take photos and videos for insurance.
| Action | Priority | Notes |
|---|---|---|
| Stop Water Source | 1 | Shut off valves, fix leaks, etc. |
| Remove Standing Water | 2 | Wet-dry vac, mops, towels |
| Increase Air Circulation | 3 | Fans, dehumidifiers, open windows (if dry) |
| Document Damage for Insurance | 4 | Photos, videos, receipts |
Identifying the Signs of Water Intrusion
So, you think your hardwood floor might have gotten wet? It happens. Sometimes it’s obvious, like after a big spill or a storm. Other times, it’s a bit sneakier. The key is to know what to look for, because catching it early can make a huge difference in how much work it takes to fix things.
Visible Indicators of Water Damage
This is usually the stuff you can see right away. Think of it as the floor waving a little flag saying, "Help! I’m wet!"
- Discoloration: You might see white stains, which are often just in the finish, or darker stains that go deeper into the wood. These dark marks can be a sign that mold is starting to grow underneath.
- Warping, Cupping, and Buckling: This is when the wood planks start to change shape. Cupping means the edges of the board are higher than the center, like a little boat. Crowning is the opposite, where the center bulges up. Buckling is the most serious, where the boards lift up off the subfloor entirely.
- Peeling or Blistering Finish: The protective coating on your floor might start to bubble up or peel away, showing the raw wood underneath.
- Soft Spots: If an area feels spongy or soft when you walk on it, that’s a bad sign. It means the wood is likely saturated and possibly starting to rot.
Subtle Clues of Hidden Moisture
Sometimes, the damage isn’t obvious. Water can get under the surface, and you might not see it for a while. These are the sneaky signs:
- Musty Odors: That damp, earthy smell? It’s almost always a sign that mold or mildew is growing somewhere you can’t see, usually under the floorboards or in the subfloor. If you notice this, it’s time to investigate further. Proper mold remediation is important if mold is found.
- Gaps Between Boards: As wood absorbs moisture and swells, it can push boards apart, creating small gaps. When it dries out, these gaps might remain or even widen.
- Changes in Texture: Even if the color looks okay, the surface might feel rougher or uneven in spots where moisture has been present.
It’s important to remember that even if your floor looks fine on the surface, hidden moisture can still be causing problems. This is especially true if the water has reached the subfloor, which can lead to more significant issues down the line.
Understanding Different Water Categories
Not all water is created equal, and knowing the source can help you figure out how serious the problem is and what kind of repairs you might need.
- Category 1 (Clean Water): This is water from a source like a leaky pipe or a spilled glass of water. It’s generally not hazardous. The main concern is the damage it can do to the wood if not dried properly.
- Category 2 (Gray Water): This water has some contaminants, like from a washing machine overflow or a dishwasher leak. It’s not immediately dangerous to health but should be cleaned up quickly.
- Category 3 (Black Water): This is the worst kind, coming from sources like sewage backups or floodwaters. It’s heavily contaminated and poses significant health risks. Floors affected by black water often need to be completely replaced, and professional help is a must.
Recognizing these signs early is your best bet for dealing with water damage. The sooner you spot a problem, the better your chances of a simple fix. For more on what to look for, check out these tell-tale signs of water damage on hardwood floors.
Assessing the Severity of Floor Damage
Okay, so you’ve stopped the water and gotten most of it up. Now comes the part where you really need to look closely at what’s happened to your hardwood floors. This isn’t just about how it looks right now; it’s about figuring out if the damage is something you can tackle yourself or if it’s time to call in the pros. The longer water sits, the worse the problems get.
Evaluating Warping, Cupping, and Buckling
These are the most obvious physical signs that water has messed with your wood. You’ll want to check for a few things:
- Cupping: This is when the edges of your floorboards are higher than the center, making them look like little canoes. It usually means the bottom of the wood got wetter than the top.
- Crowning: This is the opposite of cupping. The center of the board bulges up, and the edges dip down. It can happen if the top of the wood got wet or the bottom dried out too fast.
- Buckling: This is the most serious. The planks lift up off the subfloor, creating humps or waves. This means a lot of moisture got in, and the subfloor might be involved.
If you see significant buckling, it’s a strong sign that replacement of damaged sections or a complete reinstallation of the flooring is typically necessary.
Recognizing Stains and Discoloration
Water doesn’t just make wood swell; it can also leave its mark. Keep an eye out for:
- White Stains: These are usually on the surface and might just affect the finish. They often look like cloudy spots.
- Dark Stains: These are a bigger concern. Darker colors usually mean the water has soaked deeper into the wood. This can sometimes be a sign of mold starting to grow.
Detecting Mold and Musty Odors
This is where things can get a bit creepy. Mold and mildew love damp, dark places, and the space under your hardwood floors can be perfect for them. You might not see it at first, but you’ll probably smell it. A persistent musty or earthy smell is a big red flag. If you notice this, it’s a good idea to look into effective mold removal right away, as mold can spread quickly and affect your home’s air quality.
Don’t underestimate a musty smell. It’s your nose telling you that something is growing where it shouldn’t be, and that can lead to bigger problems down the road if not addressed promptly. It’s better to be safe than sorry when it comes to mold.
DIY Repair Techniques for Minor Damage
Okay, so you’ve dealt with the immediate water situation, and thankfully, it looks like the damage isn’t too bad. That’s great news! For those smaller issues, like surface stains or slight warping that hasn’t gone too far, you might be able to tackle it yourself. It takes a bit of patience, but seeing your floor bounce back can be really satisfying.
Drying and Ventilation Strategies
Even if the standing water is gone, the wood might still hold onto moisture. Proper drying is super important to stop things from getting worse. You want to get air moving around those affected areas.
- Open windows and doors: If the weather permits, create a cross-breeze. This is the simplest way to get fresh air circulating.
- Use fans: Place fans strategically to blow air directly onto the damp areas. Oscillating fans work well to cover a wider space.
- Dehumidifiers: These are your best friend for pulling moisture out of the air and the wood. Run them continuously in the affected room.
- Remove rugs and furniture: Get anything that could trap moisture away from the damp spots.
The goal here is to dry the wood thoroughly, aiming for a moisture content of around 5-10%, which is typical for healthy hardwood floors. A moisture meter can help you track this, taking the guesswork out of the process.
Sanding Surface Stains and Imperfections
If you’ve got some light discoloration or minor scuffs from the water, sanding can often buff them right out. This is best for surface-level issues, not deep gouges or significant warping.
- Start with a coarser grit: If there are noticeable marks, begin with a medium-grit sandpaper (like 80-100 grit). Always sand with the grain of the wood. You can use a sanding block for small areas or a floor sander for larger sections.
- Move to finer grits: Once the stains are gone, switch to a finer grit (like 120-150 grit) to smooth out the surface. This step is key to getting a nice finish.
- Clean up dust: After sanding, thoroughly vacuum the area and wipe it down with a tack cloth to remove all the fine dust particles.
For minor surface scratches, sometimes a simple hardwood floor repair kit with a color-matching crayon can do the trick before you even think about sanding. Always test any repair method in a hidden spot first!
Refinishing and Restoring the Wood
After sanding, your floor will look a bit dull and unfinished. Now it’s time to bring back its shine and protection. This is where you’ll reapply a finish to match the rest of your floor.
- Choose your finish: You’ll want to use a product that matches your existing floor’s sheen – whether it’s matte, satin, or glossy. Polyurethane is a common choice for durability.
- Apply thin coats: Apply the finish evenly using a good quality brush or applicator. It’s better to apply several thin coats than one thick one. Let each coat dry completely according to the product instructions.
- Light sanding between coats (optional): For an extra smooth finish, you can lightly sand with a very fine grit sandpaper (220 grit or higher) between coats. Make sure to clean off all dust afterward.
Remember, even minor water damage can sometimes hide issues. If you notice any signs of mold, persistent musty smells, or if the wood feels soft or spongy after drying, it’s time to stop and call in the pros. It’s better to be safe than sorry when it comes to your home’s structure.
Once the final coat is dry and cured (this can take a few days to a week, so be patient!), your floor should look much better. If the damage was truly minor, you might have saved yourself a big headache and a lot of money. For more detailed guidance on addressing water damage, you might find resources on repairing water-damaged hardwood floors helpful.
When Professional Intervention is Necessary

Sometimes, you look at your floor after a water incident and think, "Yeah, I can totally fix this." And for minor spills, that might be true. But there comes a point where DIY just isn’t enough, and trying to wing it could actually make things worse. Knowing when to call in the pros is a sign of smart homeownership, not defeat.
Recognizing Damage Beyond DIY Scope
If the water has been sitting for more than a day or two, or if the flood was significant, it’s probably time to get an expert opinion. Things like deep warping, where the boards are really lifting or twisting, are tough to fix without specialized equipment. Also, if you start seeing dark stains that look like they’re coming from underneath, that’s a bad sign. It could mean the water has soaked through to the subfloor, and that’s a whole other ballgame.
Here are some red flags that suggest you need professional help:
- Extensive Warping or Buckling: Boards are significantly raised, twisted, or separated.
- Deep Staining or Discoloration: Dark spots or widespread color changes that sanding won’t fix.
- Musty Odors: This is a big one. It usually means mold or mildew is growing, and you can’t see it.
- Contaminated Water Source: If the water came from a sewage backup or a flood with unknown contaminants, it’s a health hazard.
- Subfloor Damage: Visible damage or suspected moisture in the layer beneath your hardwood.
The Role of Professionals in Restoration
When you call in the experts, they bring a few key things to the table. For starters, they have serious drying equipment – think industrial-strength dehumidifiers and air movers – that can pull moisture out way faster and more effectively than your home fans. They can also test for hidden moisture to make sure everything is truly dry, preventing future problems like mold or rot. Professionals are trained to identify different types of water damage and know the best way to tackle each one. They can assess if boards need to be replaced, if the subfloor needs attention, or if a full refinish will do the trick. It’s about getting the floor properly dried and restored without causing more damage. For serious issues, professional water damage restoration is the way to go.
Understanding Solid vs. Engineered Wood Differences
It’s also worth noting that professionals might approach solid hardwood and engineered hardwood differently. Solid wood is one piece of wood all the way through. It can often be sanded and refinished multiple times, so if the damage isn’t too deep, it might be salvageable. Engineered wood, on the other hand, has a thin top layer of real wood over a core of other materials. This top layer can only be sanded and refinished once or twice, if at all. If that top layer is significantly damaged by water, replacement might be the only real option, and a pro can tell you that for sure. They’ll know how to assess the construction of your floor and advise on the most cost-effective and sensible repair method.
Preventative Measures to Protect Your Floors
After dealing with water damage, the last thing you want is a repeat performance. Luckily, most water-related issues with hardwood floors are totally avoidable with a little bit of attention. Think of it like maintaining your car – regular check-ups and a bit of care go a long way.
Regular Inspections and Maintenance
Your first line of defense is simply looking around. Make it a habit to check under sinks, around toilets, and near appliances that use water every few months. Even a small drip can turn into a big problem if left unnoticed. Also, keep an eye on appliance hoses; rubber ones on washing machines and dishwashers should be swapped out every 3-5 years. Upgrading to braided stainless steel hoses is a smart move for added durability. Sealing any gaps around water lines can also stop sneaky leaks from getting under your floors.
Managing Indoor Humidity Levels
Wood is sensitive to moisture in the air. It expands when it’s humid and shrinks when it’s dry. To keep your floors happy and stable, aim to maintain indoor humidity levels between 35% and 55%. You can use a humidifier during dry winter months and a dehumidifier when the summer air gets thick and heavy. This helps prevent boards from warping or developing unsightly gaps. Smart thermostats can often help manage this automatically.
Promptly Addressing Leaks and Spills
This might sound obvious, but it’s worth repeating: clean up spills immediately. Don’t let water sit on your hardwood, even for a short time. The longer it’s there, the more it can soak in. For areas prone to spills, like kitchens or entryways, consider using waterproof mats. These act as a buffer and catch most of the mess before it reaches the wood. For 24/7 peace of mind, affordable smart water leak sensors can alert your phone the moment they detect moisture, giving you a head start on any potential issues. Fix leaks promptly is always the best policy.
Keeping your floors in good shape means being proactive. A little effort now can save you a lot of headaches and money down the road. Don’t wait for a problem to happen; take steps to prevent it.
Here’s a quick rundown of what to keep in mind:
- Inspect regularly: Check pipes, hoses, and appliances for any signs of leaks.
- Control humidity: Use humidifiers or dehumidifiers to keep air moisture in the 35-55% range.
- Act fast: Clean up spills right away and address any leaks immediately.
- Protect high-traffic areas: Use mats near sinks and entrances to catch drips and spills.
Wrapping Up: Keeping Your Floors Looking Great
So, dealing with water on your hardwood floors is definitely a pain. It’s one of those things that can sneak up on you and cause a real mess. But, as we’ve gone over, acting fast is the name of the game here. Getting that water up and the area dried out quickly can make a huge difference in whether you’re looking at a simple fix or a whole floor replacement. Remember to keep an eye out for those warning signs like warping or weird smells, and don’t hesitate to call in the pros if things look too serious. Taking a few simple steps to prevent future leaks and spills will also save you a lot of headaches down the road. Your floors are a big part of your home, so giving them a little attention when they need it will pay off.
Frequently Asked Questions
What’s the very first thing I should do if my hardwood floor gets wet?
Your immediate goal is to stop the water source. If a pipe burst or a sink overflowed, shut off the water right away. Then, soak up all the standing water you can with towels, mops, or a wet-dry vacuum. The faster you get the water off the floor, the less damage it will do.
How long do I have before water causes permanent damage to my hardwood floors?
Time is super important! Within the first 24 hours, you can often prevent long-term problems like warping and mold. After 24-48 hours, things like cupping (where the edges of the boards rise) can start. The longer water sits, the more likely you’ll need serious repairs or even a full replacement.
What are the main signs that my hardwood floor has water damage?
Look for boards that are bent, lifted, or look swollen (this is called warping or buckling). You might also see dark spots or stains, or notice a musty smell, which could mean mold is growing. Sometimes, gaps can appear between the boards too.
Can I fix minor water damage on my hardwood floors myself?
For small spills that you catch right away, yes! Drying the area really well with fans and a dehumidifier is key. If there are only light surface stains, you might be able to sand them down and then refinish that spot. But if the wood is deeply soaked or warped, it’s usually best to get professional help.
When should I absolutely call a professional for water-damaged hardwood floors?
If the water has been there for more than a day, or if you see major warping, dark stains, or smell mold, it’s time for the pros. Also, if the water was dirty (like from a sewer backup), you definitely need experts to handle it safely. They have special tools to find hidden moisture and prevent bigger issues.
How can I stop my hardwood floors from getting damaged by water in the future?
Be proactive! Check for leaks around sinks, pipes, and appliances regularly. Clean up spills right away. Using rugs near entrances and sinks can help catch water. Keeping your home’s humidity at the right level (usually between 30-50%) also makes a big difference.