Mold can be a real headache, right? You might smell something musty or see weird spots and wonder, ‘Is that mold?’ Figuring out how to test home for mold doesn’t have to be super complicated. We’ll walk through some simple ways to check your place, from just looking around to using a few basic tools. Sometimes, you might even need to call in the pros, but let’s start with what you can do yourself.
Key Takeaways
- Start by looking for obvious signs of water damage like stains or bubbling paint, and trust your nose if you detect a musty smell.
- Use a moisture meter to find damp spots that mold loves, and poke suspect areas with a screwdriver to check for rot.
- DIY mold test kits can give you an idea of what’s in the air or on surfaces, but they aren’t always perfectly accurate.
- Check your HVAC system and look for external water issues, like leaky roofs or poor drainage, as these are common places for mold to start.
- If you see a lot of mold, suspect it’s making you sick, or the problem keeps coming back, it’s time to call in a professional mold tester.
Initial Mold Detection Methods
Before you even think about buying a test kit, there are some simple ways to get a feel for whether mold might be lurking in your home. It often starts with what you see and smell. Mold needs moisture to grow, so keeping an eye out for dampness is key.
Look for Visual Signs of Moisture
Sometimes mold is obvious, but often it hides. You know, like that little spot you see on the ceiling? It might be more than just a stain. Look for things like:
- Bubbling or peeling paint: This can happen when moisture gets behind the paint.
- Water stains: Check ceilings, walls, and especially around windows and under sinks.
- Damp spots: Feel walls, especially in basements or bathrooms. Are they cool and damp to the touch?
- Discoloration: Any unusual dark or colored patches on walls, ceilings, or floors could be a sign.
It’s easy to dismiss small spots, but they can sometimes point to a much larger problem hidden away. If you’ve had any recent leaks or water damage, mold is definitely something to consider. Inspect places like under carpets, behind drywall, inside ductwork, and within bathroom spaces because these are common hiding spots.
Conduct a Smell Test
This one is a bit subjective, but your nose can be a good indicator. Does your home have a persistent musty or earthy smell? If it seems stronger in certain areas or is getting worse over time, it’s worth investigating further. Everyone’s sense of smell is different, but if something smells off in your own home, it’s usually for a reason.
Identify Condensation Patterns
See moisture collecting on your windows, especially the exterior ones? Or maybe on walls? This ‘sweating’ is a sign that your home might be too humid. High humidity creates the perfect environment for mold to start growing. While a little condensation might not seem like a big deal, it can point to a bigger air quality issue that needs attention.
Mold needs a few things to grow: a comfortable temperature, oxygen, something to feed on (like wood or fabric), and most importantly, moisture. If you can eliminate the moisture, you can stop mold before it even starts.
Using Tools to Test for Mold
Sometimes, you can’t see mold, but you know something’s not right. That’s where tools come in handy. They help you get a clearer picture of what’s going on, especially in those hidden spots.
Employ a Moisture Meter
If you suspect dampness, a moisture meter is your best friend. These gadgets measure the water content in materials like wood, drywall, and insulation. High readings, generally above 20%, signal a problem area where mold could be thriving. You’ll want to pay extra attention to places prone to moisture, like around windows, under sinks, and in basements. It’s a simple way to pinpoint potential trouble before it becomes a visible mold issue.
Probe Suspect Areas with a Tool
For areas where you suspect rot might be setting in, a simple tool can tell you a lot. Grab a screwdriver or something similar and gently poke at the suspect material, especially wood. If the material feels soft, spongy, or crumbles easily, it’s a strong indicator that mold has taken hold and is causing decay. This is different from mildew, which usually stays on the surface. This method helps you understand if the mold is just a surface issue or if it’s damaging the structure itself.
Monitor Indoor Air Quality
Air quality monitors can be a real eye-opener. Some of these devices can actually measure the concentration of mold spores floating around in your home’s air. If you’re experiencing unexplained allergy symptoms or just have that persistent musty smell, an air quality monitor can help determine if elevated mold spore levels are the culprit. This is especially useful if you can’t find any visible signs of mold. You can find various types of mold testing kits that include air sampling components.
Sometimes, the most telling signs of mold aren’t visible to the naked eye. Using tools like moisture meters and air quality monitors allows you to detect problems in their early stages, often before they become serious health or structural concerns. It’s about being proactive and gathering data to understand your home’s environment better.
DIY Mold Test Kits Explained
So, you’ve got a hunch there might be some mold lurking around your place. Maybe you’ve seen some spots, or there’s that faint musty smell you just can’t shake. When you’re not ready to call in the pros just yet, a DIY mold test kit can be a good next step. These kits are pretty common and you can usually find them online or at your local home improvement store. They’re designed to give you a bit of peace of mind and help you figure out if you’ve got a mold issue on your hands.
Understand Air and Surface Test Kits
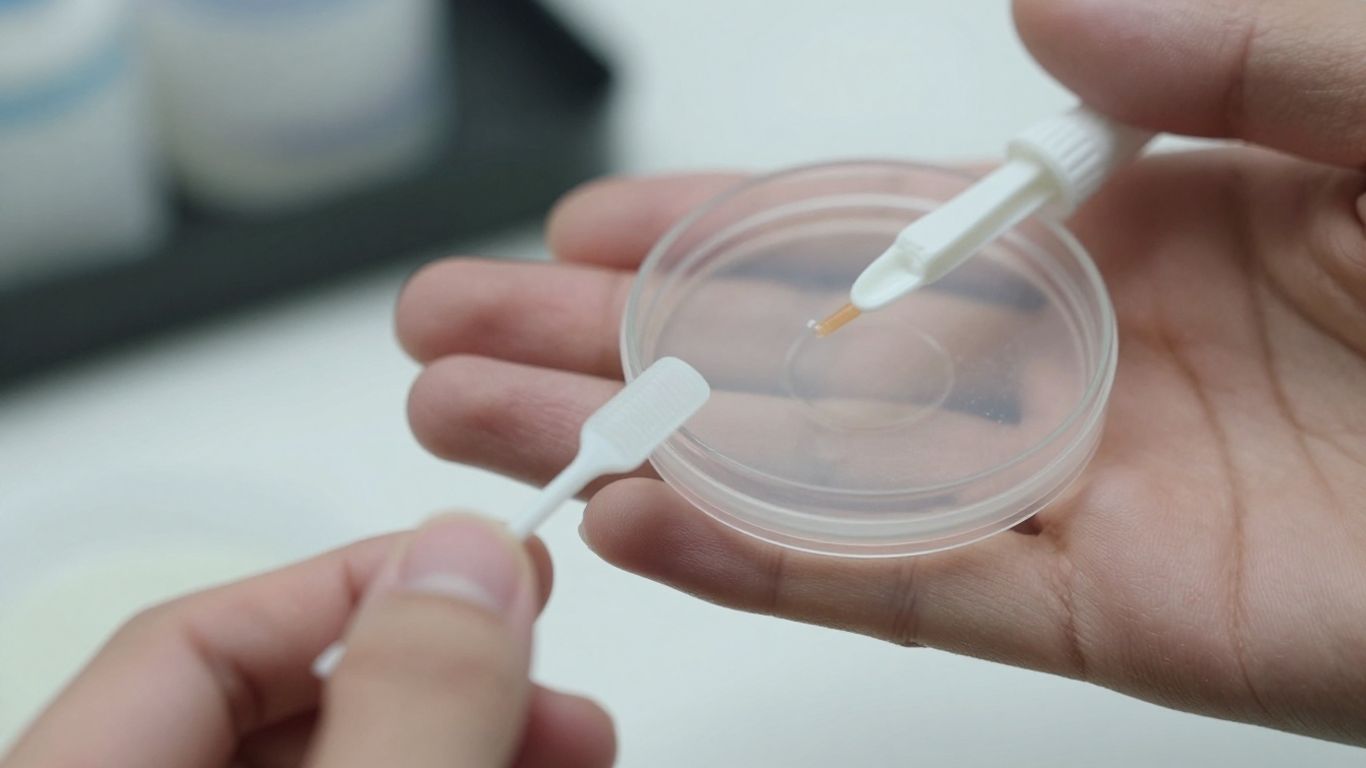
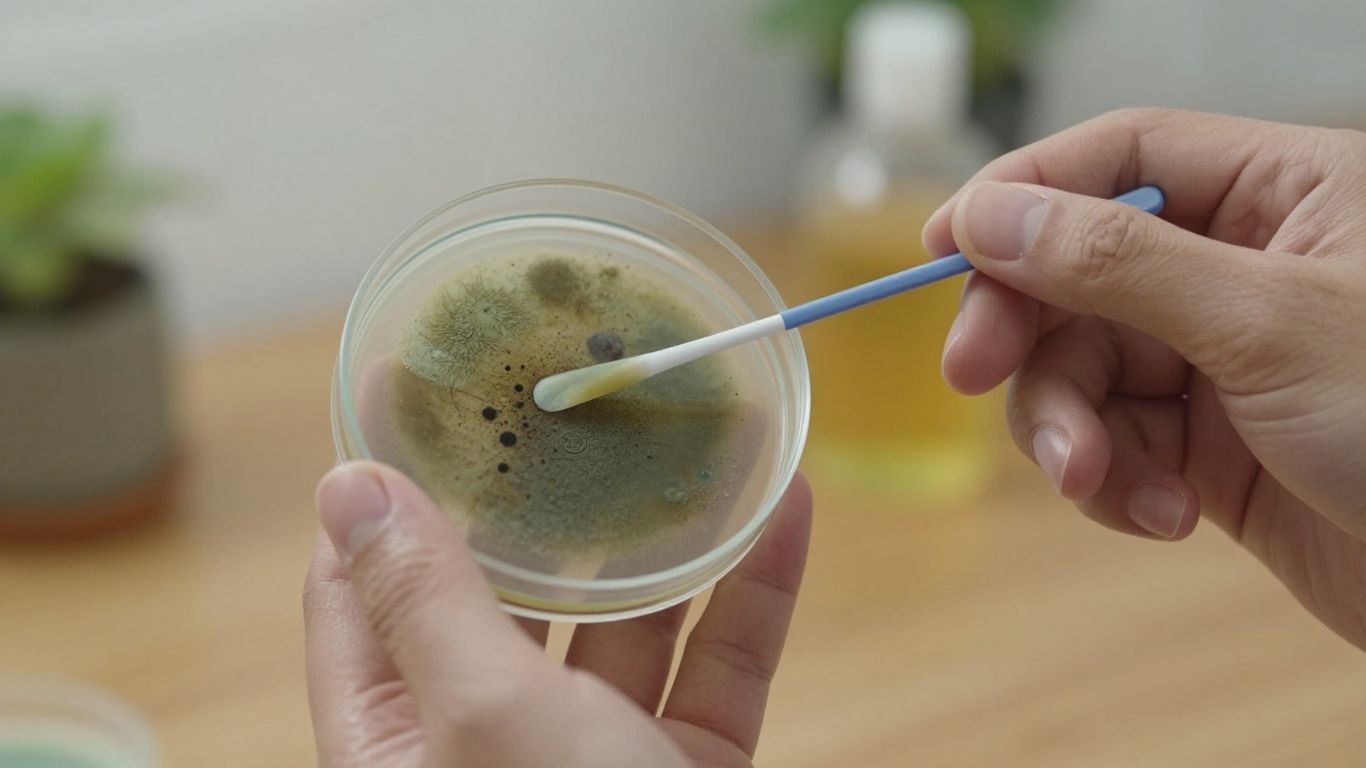
There are generally two main types of DIY mold test kits: air sample kits and surface sample kits. Air sample kits work by collecting spores floating around in your home’s air. You usually leave a collection device out for a set period, and then you might mail it off to a lab for analysis. Surface kits, on the other hand, are for when you can actually see something suspicious. They often come with sticky tape or swabs to lift a sample directly from a wall, ceiling, or other surface. The idea is to get a sample of whatever is growing there.
Here’s a quick rundown:
- Air Sample Kits: Good for checking if mold spores are circulating in your home, especially if you can’t pinpoint a visible source.
- Surface Sample Kits: Best for when you see visible growth and want to confirm if it’s mold and what type.
Some kits even offer a combination of both, which can give you a more complete picture. For example, the Mold Armor DIY Home Mold Test Kit is one option that aims to detect mold in your air, on surfaces, and even in your HVAC system.
Properly Use a Mold Test Kit
Using these kits isn’t rocket science, but you do need to follow the instructions carefully to get any useful results. Most kits come with a booklet that tells you exactly what to do. For air samples, you’ll typically need to place the collection device in the area you want to test for a specific amount of time, making sure not to disturb it. For surface samples, you’ll carefully swab or tape a small section of the suspect area. It’s important to test multiple areas if you suspect mold in different parts of your house, especially if you have more than one level or areas that have experienced leaks.
Remember, the accuracy of DIY kits can vary. They’re great for initial detection and peace of mind, but they might not be as precise as professional lab testing. If you get a result that concerns you, or if you’re just not sure, it’s always a good idea to consider professional testing.
Interpreting DIY Test Results
This is where things can get a little tricky. Some kits give you results right away, while others require you to mail your samples to a lab. If you’re mailing samples, it can take a few days to get your report back. The report will usually tell you if mold was detected, and sometimes, what type of mold it is. Keep in mind that all homes have some mold spores in the air; the key is whether the levels are elevated or if there’s active growth. If the kit indicates a high concentration of spores or identifies specific types of mold known to cause health issues, it’s a sign you need to take action. If you’re unsure about what the results mean, many companies offer support to help you understand the data. For more serious concerns, professional mold testing might be the next step.
| Test Type | What it Detects | Typical Use Case |
|---|---|---|
| Air Sample | Mold spores in the air | Suspected airborne mold, general air quality check |
| Surface Sample | Mold growth on a specific surface | Visible spots, musty smells from a particular area |
| Combined Kit | Both air and surface mold | Comprehensive check, when unsure of the source or type of mold |
If you’re looking for effective mold removal kits, there are various options available, but understanding what each type of DIY test does is the first step.
Investigating Potential Mold Sources
Okay, so you’ve done the initial sniff test and maybe even spotted some suspicious spots. Now it’s time to get a bit more detective-like and figure out why the mold might be showing up in the first place. Mold needs moisture to grow, so finding the source of that dampness is key to stopping it in its tracks. It’s not just about cleaning up the visible stuff; you’ve got to tackle the root cause.
Check Your HVAC System
Your heating, ventilation, and air conditioning (HVAC) system can be a hidden culprit for mold growth. The ductwork, especially if it’s in a damp attic or not sealed up tight, can become a breeding ground. Think about it: warm, moist air from the attic meeting the cooler air inside your ducts, especially during warmer months, can create condensation. This moisture can then lead to mold forming inside or around the ducts. If you notice mold on your ceiling near a vent, and there’s no sign of a roof leak, your ductwork might be the issue. Regular check-ups and cleaning of your HVAC system are a good idea to prevent this. It’s a good way to keep mold from spreading throughout your house via the air. Keeping your ducts clean can make a big difference.
Examine Exterior Water Intrusion Points
Don’t forget to look outside your home. Water getting in from the outside is a major cause of indoor mold. This could be anything from leaky gutters that aren’t directing water away from your foundation, to cracks in your exterior walls or foundation, or even poor grading around your house that allows water to pool near the foundation. Check for any signs of water damage on your siding, around windows and doors, and where pipes enter your home. If water is getting in, it’s creating a damp environment perfect for mold to start growing inside.
Mold thrives in damp conditions. Identifying and fixing the source of moisture is the most important step in getting rid of it and preventing it from coming back. Simply cleaning the mold without addressing the water problem is like putting a band-aid on a broken bone – it won’t solve the underlying issue.
Here are some common exterior issues to investigate:
- Gutters and Downspouts: Make sure they are clear of debris and that downspouts are extending far enough away from your foundation.
- Cracks and Gaps: Inspect your foundation, walls, and around windows and doors for any openings where water could seep in.
- Roof: Look for damaged shingles or flashing that could allow water into your attic or walls.
- Landscaping: Ensure the ground slopes away from your house so water drains properly.
Addressing these external water sources is a big part of preventing mold from developing in the first place. It might seem like a lot, but taking the time to find and fix these issues can save you a lot of trouble down the road.
When to Seek Professional Mold Testing
Look, sometimes you can handle a little bit of mold yourself. If it’s a small spot on a tile in the bathroom, maybe you can just scrub it off. But there are definitely times when you need to call in the pros. It’s not just about having the right tools; it’s about knowing what you’re looking at and not making things worse.
Recognizing When DIY Isn’t Enough
If you’ve tried the DIY kits and the results are confusing, or if you’re just not getting a clear answer, that’s a big sign. Also, if you’ve cleaned a spot and it keeps coming back, that means the moisture source hasn’t been fixed, and the mold will just return. Don’t underestimate persistent mold issues. If you have health concerns, especially if anyone in the house has asthma, allergies, or a weakened immune system, it’s really best to get a professional opinion. They can tell you for sure what’s going on and how bad it is.
Here are some situations where calling a professional is a smart move:
- The moldy area is larger than about 10 square feet.
- You suspect mold is in your HVAC system or ductwork.
- You’ve had significant water damage, like from a flood.
- Mold keeps reappearing after you clean it.
- You or someone in your household is experiencing unexplained health problems that might be related to mold.
Trying to tackle a large or complex mold problem on your own can sometimes spread spores into the air, making the situation worse and potentially exposing more people to health risks. It’s better to be safe than sorry when it comes to your home’s air quality.
Understanding Professional Testing Methods
Professionals have equipment that goes way beyond what you can buy at the store. They can do air sampling using specialized vacuums that pull air through a filter, which is then sent to a lab for detailed analysis. This gives a much more accurate count of mold spores in the air than most DIY kits. They can also use tools like thermal cameras to find hidden moisture behind walls, which is a common place for mold to grow unseen. They’re trained to identify different types of mold and understand the health implications associated with them. Getting a professional assessment can provide accurate and affordable solutions for homeowners.
Factors Influencing Professional Consultation
Several things should make you think about hiring a professional. The size of the mold problem is a big one; if it’s more than a small patch, it’s time to call. Also, consider the history of your home. If it’s an older house with known moisture issues or past water damage, it’s wise to get it checked out regularly. The cost of professional testing can vary, but it’s often worth it for the peace of mind and accurate results. If you’re dealing with a situation where insurance might be involved after water damage, a professional report is usually necessary. Ultimately, if you’re unsure or uncomfortable about the mold situation, bringing in an expert is the safest bet. For extensive mold issues, professional assessment is recommended.
Wrapping Up Your Mold Check
So, you’ve gone through the steps to check your home for mold. Whether you spotted something obvious or used a kit to check the air, you’ve taken a good first step. Remember, mold likes damp spots, so keeping an eye on leaks and humidity is key. If you found something concerning, or if you’re just not sure, don’t hesitate to call in a professional. They have the tools and know-how to really figure out what’s going on and how to fix it. Taking care of your home means taking care of your health, and a little effort now can save a lot of trouble later.
Frequently Asked Questions
What are the first signs that I might have mold?
Start by looking for wet spots or water damage on walls, ceilings, or floors. Sometimes paint might bubble up, or you might see strange colored patches. Also, trust your nose! A musty or earthy smell that won’t go away is a big clue. If your windows or walls seem to be sweating a lot, that’s another sign that your home might be too damp for mold.
Can I test for mold myself at home?
Yes, you can! There are kits you can buy at stores or online that help you check for mold. These kits usually involve collecting air samples or swabbing surfaces you suspect have mold. They can give you an idea if mold is present, but they aren’t always perfectly accurate.
How do DIY mold test kits work?
Most DIY kits come with a special dish or swab. You place the dish in an area for a few days to catch mold spores from the air, or use the swab to collect samples from surfaces. Then, you usually send these samples to a lab for testing. The lab report will tell you what types of mold you might have and how much.
When should I think about calling a professional for mold testing?
If you see a lot of mold, especially after a flood, or if you suspect mold is making you or your family sick, it’s best to call a pro. Also, if you’ve tried cleaning mold and it keeps coming back, or if the moldy area is bigger than a small spot (like a 3-foot by 3-foot area), a professional can give you a more thorough assessment.
Are professional mold tests better than DIY kits?
Professionals often use more advanced methods, like ‘scrub tests’ that pull air through a special filter using a vacuum. These samples are then sent to a medical lab, which can provide a more detailed and accurate report than most home kits. They can identify specific mold species and their amounts.
What causes mold to grow in the first place?
Mold needs a few things to grow: moisture, food (like wood or paper), oxygen, and a comfortable temperature. The biggest factor you can control is moisture. Leaky pipes, condensation, or water that doesn’t dry out quickly can create the perfect environment for mold to start growing.