Finding water on your hardwood floors can be a real headache. It’s the kind of problem that makes you instantly worry about the cost and the mess. Whether it was a leaky pipe, a spilled drink, or something bigger, water damage to wood floors needs attention. This guide will walk you through understanding the damage, what to do right away, and how to fix it, covering everything from simple DIY fixes to when you really need to call in the pros. We’ll also touch on how to prevent this from happening again, because nobody wants a repeat of this situation.
Key Takeaways
- Acting fast is the most important thing when dealing with water damage on wood floors. The sooner you address the problem, the better your chances of saving your floors.
- Not all water damage is the same. Understanding the source of the water (clean vs. contaminated) and how long it was there helps decide if you can fix it yourself or need professionals.
- Drying the floors completely is a critical step. Hidden moisture can lead to mold and more damage later on, so use fans and dehumidifiers until the wood is dry.
- For minor issues like light staining on solid hardwood, DIY repairs like sanding and refinishing might be possible. However, significant swelling, buckling, or subfloor damage usually means you need professional help.
- Preventing future water damage is key. Regular checks for leaks, managing indoor humidity, and keeping your floors sealed can protect your investment in the long run.
Understanding Water Damage and Your Wood Floors
Water and wood floors? Not a great combination, honestly. When water gets onto your hardwood, it doesn’t just sit there. Wood is like a sponge; it soaks up moisture. This absorption process can lead to all sorts of problems, from minor surface issues to major structural damage that can ruin your entire floor. It’s important to know what you’re dealing with right from the start.
Identifying the Causes of Water Intrusion
Water damage doesn’t just happen out of nowhere. Usually, there’s a specific reason water found its way to your floors. Knowing the source is the first step in fixing it and preventing it from happening again. Common culprits include:
- Appliance Leaks: Think dishwashers, washing machines, or refrigerators with ice makers. A faulty hose or seal can release a surprising amount of water.
- Plumbing Issues: Burst pipes, leaky faucets, or even a toilet overflow can send water cascading onto your floors.
- Roof or Window Leaks: During heavy rain, water can find its way through compromised roofing or poorly sealed windows.
- High Humidity: While not a sudden flood, consistently high indoor humidity can slowly saturate wood, causing it to swell and warp over time.
- Flooding: This is the big one, usually from severe weather or overflowing rivers, and it affects everything in its path.
Understanding the origin of the water is key. It helps determine the type of water you’re dealing with (clean, grey, or black) and the best course of action for cleanup and restoration.
Recognizing Different Types of Wood Floor Water Damage
Not all water damage looks the same, and the type of damage dictates how you’ll fix it. Here’s a quick rundown:
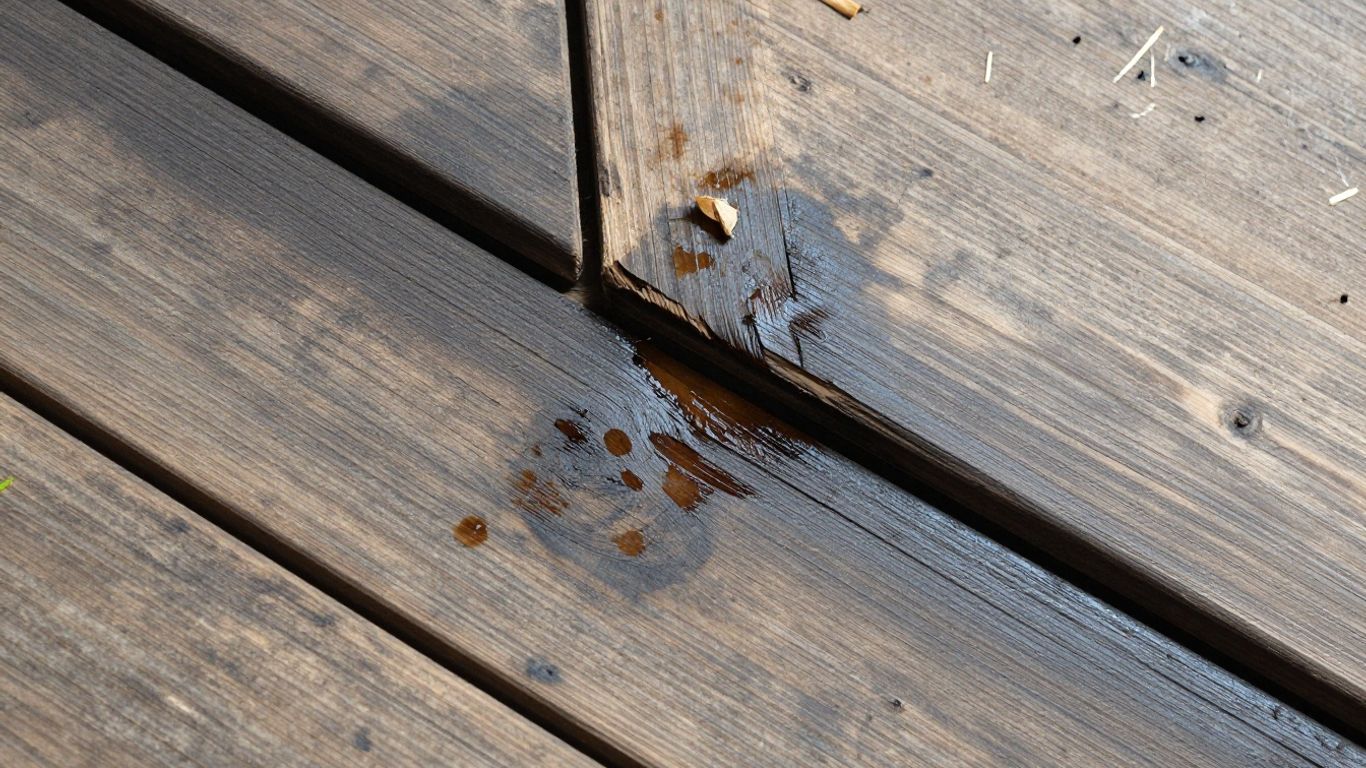
- Surface Water Damage: This is usually from spills or brief exposure. You might see some staining or slight discoloration on the finish. Often, this can be fixed with a good cleaning or refinishing.
- Moisture Absorption Damage: This happens when water soaks into the wood fibers. The wood swells, leading to cupping (where the edges of the boards are higher than the center) or crowning (the opposite). This is more serious and might be reversible with proper drying.
- Structural Water Damage: This is when the water has gone deep into the wood and potentially the subfloor. You’ll see significant warping, buckling, or even separation of the boards. This often means replacement is needed.
- Contaminated Water Damage: If the water comes from sewage or floodwaters, it’s considered contaminated. For health reasons, floors damaged by this type of water usually need to be removed and replaced entirely, regardless of how long they were exposed.
Assessing the Severity of Water Intrusion
So, how bad is it, really? Your assessment needs to be honest. The longer water sits on your wood floors, the worse the damage will likely be.
Here’s a simple way to think about it:
- Minor: A small spill that was wiped up quickly. You might see a faint stain or slight discoloration. The wood likely hasn’t swollen much.
- Moderate: Water sat for a few hours or a day. You’ll probably see cupping, some staining, and maybe the finish is starting to peel. The subfloor might be damp.
- Severe: Water was present for multiple days, or it was a significant flood. Expect major buckling, warping, separation, and likely mold growth. The subfloor is almost certainly compromised.
When assessing, pay attention to the timeline of exposure and the type of water. If you suspect mold or if the damage seems extensive, it might be time to call in the pros. For more on dealing with water damage, resources like the National Wood Flooring Association can offer detailed insights.
Immediate Actions for Water Damaged Wood Floors
Okay, so you’ve found water on your wood floors. Don’t panic, but definitely don’t wait around either. The first 24 hours are absolutely critical for saving your floors from permanent damage like warping or mold. Think of it like a race against time.
Prioritizing Safety: Electrical and Structural Concerns
Before you even think about mopping, you need to make sure the area is safe. Water and electricity are a terrible mix. If the water is near any outlets or electrical cords, shut off the power to that section of your house at the breaker box. Seriously, don’t skip this. It’s better to be in the dark for a bit than to risk a shock. Also, take a quick look around. Does the floor feel spongy? Are there any weird gaps or sagging? If things look structurally unsound, avoid walking on those areas. You don’t want to put more stress on a compromised subfloor.
Stopping the Water Source and Initial Mitigation
Your very first move should be to find out where the water is coming from and stop it. Is it a leaky pipe under the sink? An overflowing toilet? A roof leak? Shut off the main water valve if you have to. Once the flow stops, you need to get rid of the standing water. Grab a wet-dry vacuum – they’re way better than a regular vacuum for this. If you don’t have one, use old towels and mops. Get as much water up as you can, as fast as you can. Every minute counts. Also, pull out any rugs or furniture that got wet. They’ll just trap moisture against the floor.
Documenting Damage for Insurance Claims
This is where you become a detective. Before you start cleaning up too much, take a ton of pictures and videos. Get shots of the water source, how far the water spread, and any visible damage to the wood. The more documentation you have, the smoother your insurance claim will likely be. Keep records of any emergency services you call and any temporary fixes you make, too. It all adds up.
Remember, the goal right now is to stop the water, remove what you can, and make the area safe. Don’t worry about perfection; just focus on immediate damage control. The actual restoration comes later.
The Critical Drying Process for Water Damaged Floors
Okay, so you’ve stopped the leak and maybe even mopped up the worst of it. That’s a good start, but the real work for your wood floors is just beginning. Getting them properly dry is super important. If you don’t dry them out right, you’re going to end up with bigger problems down the road, like mold or warped boards that just won’t lay flat anymore. This isn’t like drying a towel; it’s a bit more involved.
Essential Equipment for Effective Drying
Forget about just opening a window or pointing a regular fan at the floor. That usually doesn’t cut it and can even make things worse by drying the surface too fast. You need specialized gear. Think industrial-grade stuff, not what you’d find in a typical home.
- Dehumidifiers: These aren’t your average closet dehumidifiers. You’ll want commercial-grade units that can pull a lot of moisture out of the air. They help create an environment where the wood can release its moisture without getting damaged.
- Air Movers: These are powerful fans designed to create consistent airflow across the entire affected area. They help push moist air away from the floor and bring drier air in, speeding up the evaporation process.
- Moisture Meters: You absolutely need one of these. It’s the only way to know for sure how wet the wood actually is, deep down. You can’t just guess; you need actual numbers. There are different types, like pin meters that poke into the wood (use these carefully!) and pinless ones that scan the surface.
Trying to dry wood floors with just household fans or space heaters is a bad idea. It can lead to uneven drying, which can cause more damage. Professionals have the right tools to do this safely and effectively.
Implementing a Step-by-Step Drying Strategy
So, you’ve got the gear. Now what? It’s all about a methodical approach. Rushing this part is a mistake.
- Set up your equipment: Place the dehumidifiers and air movers strategically. You want to create a consistent drying environment. If the water got under baseboards, you might need to remove them to get air back there. Sometimes, special mats or injection systems are used to pull moisture from under the floor, but that’s usually pro territory.
- Control the environment: Keep doors and windows closed while the dehumidifiers are running to keep the humid outside air from coming in. You’re trying to create a controlled drying zone.
- Start the drying: Turn everything on and let it run. This isn’t a quick process; it can take several days, sometimes even a week or more, depending on how wet things got.
Monitoring Moisture Levels and Adjusting Equipment
This is where that moisture meter comes in handy. You can’t just set it and forget it.
- Daily Checks: You need to check the moisture content of the wood every single day. You’re looking for the moisture level to drop steadily.
- Target Numbers: For most solid hardwood, you’re aiming for a moisture content between 6% and 9%. Engineered wood might have slightly different targets, but the goal is to get it back to a stable, dry state.
- Adjust as Needed: Based on your readings, you might need to move the air movers around, adjust the dehumidifier settings, or even add more equipment if things aren’t drying evenly. If one spot is drying much slower than another, you need to focus your efforts there. This constant monitoring and adjustment is key to successful hardwood floor drying.
It’s a bit of a science, and patience is definitely a virtue here. If you’re seeing signs of mold or the moisture levels just aren’t budging, it might be time to call in the pros. They have even more advanced tools and techniques to tackle tough situations.
When DIY Repair is Appropriate for Water Damaged Floors
So, you’ve got a water situation on your hands, and your wood floors are looking a little sad. Before you panic or immediately call in the big guns, let’s talk about when you might be able to tackle this yourself. Not all water damage is created equal, and some situations are definitely more DIY-friendly than others. It really comes down to a few key factors.
Ideal Conditions for Homeowner Intervention
If the water exposure was brief and the water itself was clean (think a leaky appliance, not a sewage backup), you might be in luck. The quicker you can act, the better your chances of a successful DIY repair. Ideally, you’re dealing with surface water that hasn’t soaked deep into the wood or, more importantly, the subfloor. Solid hardwood floors tend to be more forgiving for DIY fixes than engineered or laminate flooring. If your floor is still relatively flat, without significant warping or cupping, and you can get it dried out fast, you’re probably a good candidate for a DIY approach.
Here’s a quick rundown of when DIY might work:
- Water Type: Clean water only (no sewage or floodwater).
- Response Time: You addressed the leak and started drying within 24-48 hours.
- Floor Type: Solid hardwood is generally more manageable than engineered or laminate.
- Damage Extent: Primarily surface-level water, with minimal swelling or structural issues.
- Mold: Absolutely no signs of mold growth.
Remember, even with clean water, prolonged exposure can cause hidden damage. Always err on the side of caution if you’re unsure.
Necessary Tools and Materials for DIY Repair
If you’ve decided to go the DIY route, you’ll need a few things to get the job done right. You can’t just grab a mop and call it a day. Proper drying is key, and that means having the right equipment. Renting some of these items might be a good idea if you don’t plan on needing them often.
- Drying Equipment: High-velocity air movers (fans) and dehumidifiers are your best friends here. You want to circulate air and pull moisture out of the environment.
- Moisture Meter: This is non-negotiable. You need to know when the wood is actually dry, not just when it feels dry. Aim for a moisture content of 6-9% for most wood species.
- Cleaning Supplies: A good wood floor cleaner and possibly a mild disinfectant.
- Repair Materials: Fine-grit sandpaper, wood stain that matches your floor, and a quality polyurethane finish. You’ll also need applicators for the stain and finish.
Limitations of DIY Water Damage Restoration
Now, let’s be real. DIY isn’t always the answer. There are times when trying to fix it yourself can actually make things worse or lead to bigger problems down the line. If you notice any significant warping, buckling, or separation of the floorboards after drying, that’s a big red flag. Persistent musty odors are another sign that mold might be lurking, and that’s a job for professionals. Also, if the water has gotten under the flooring and into the subfloor, especially if it’s showing signs of rot or weakness, you’re likely beyond a simple DIY fix. Trying to patch up severe damage can lead to uneven floors, mold issues, and ultimately, the need for a complete replacement anyway. For extensive damage or if you’re dealing with contaminated water, it’s always best to consult with water damage restoration specialists.
Professional Restoration for Severe Water Damage
Sometimes, the damage to your wood floors from water is just too much to handle on your own. It’s not a sign of failure; it’s just recognizing when a job needs a bigger toolkit and more know-how. If you’re seeing serious warping, buckling, or if the water sat around for a while, especially if it wasn’t clean water, it’s probably time to call in the pros. They have the specialized gear and the experience to tackle situations that are beyond typical DIY fixes.
Warning Signs That Require Professional Help
It’s easy to get overwhelmed by water damage. Knowing when to step back and let the experts take over can save you a lot of headaches and potentially save your floors. Here are some clear indicators that you need professional help:
- Extensive Warping or Cupping: If your floorboards are significantly bent, curled, or separated, it suggests deep moisture saturation that DIY drying methods likely can’t fix.
- Persistent Musty Odors: A strong, lingering smell of mold or mildew, even after initial drying attempts, points to hidden mold growth that needs professional remediation.
- Subfloor Involvement: If water has seeped into the subfloor, causing it to swell or rot, this structural issue requires professional assessment and repair.
- Contaminated Water Source: If the water came from a sewage backup or floodwaters, it’s considered contaminated and requires specialized cleaning and sanitization protocols that professionals are equipped for.
- Engineered or Laminate Flooring Issues: While solid hardwood can sometimes be salvaged, engineered wood can delaminate, and laminate can swell irreversibly. Professionals can assess if these materials are salvageable or need replacement.
When water damage is severe, it’s not just about the surface. Professionals look at the whole picture, including the subfloor and the structural integrity of your home, to make sure the problem is solved completely and doesn’t come back.
What to Expect from Professional Restoration Services
Calling in the professionals means you’re handing over the problem to a team trained to deal with it. They’ll start with a thorough assessment to figure out exactly how bad things are. This usually involves using advanced tools to find moisture you can’t see. Then, they’ll create a plan to dry everything out properly, which often involves industrial-grade equipment. After drying, they’ll assess what repairs are needed, like replacing boards, sanding, and refinishing. They aim to restore your floors to their pre-damage condition, or as close as possible. You can expect detailed documentation throughout the process, which is helpful for insurance claims. They have the right tools for the job, like specialized wood floor drying mats that can target moisture trapped under the floorboards without causing more damage.
Understanding Professional Equipment and Techniques
Professionals bring out the heavy artillery when it comes to water damage. They don’t just use a few fans; they employ a range of industrial equipment designed for maximum efficiency. This includes:
- Truck-Mounted Water Extractors: These powerful units can remove a significant amount of water quickly from carpets and subfloors.
- Industrial Dehumidifiers: Unlike home units, these are designed to pull large amounts of moisture from the air, helping to control humidity levels in the affected area.
- High-Velocity Air Movers: Strategically placed, these fans create airflow patterns that speed up the evaporation process, drying out wood and surrounding materials.
- Thermal Imaging Cameras and Moisture Meters: These tools allow technicians to map out hidden moisture pockets within walls, floors, and subfloors, ensuring no damp spots are missed.
- Injection Drying Systems: For moisture trapped beneath the floorboards or within the subfloor structure, these systems can introduce controlled airflow to dry these areas effectively.
These tools, combined with their knowledge of wood behavior and drying science, allow restoration specialists to tackle severe water damage that would be impossible for a homeowner to manage.
Restoring Your Wood Floors After Water Damage
So, your wood floors have been through a water incident. It’s a bummer, for sure. But don’t throw in the towel just yet! Depending on how bad things got and how quickly you acted, there’s a good chance you can bring them back to life. This is where the real work begins, turning that water-logged mess into something you’re proud of again.
Assessing and Cleaning the Affected Areas
Once everything is bone dry – and I mean really dry, check those moisture meter readings – it’s time to take a good, hard look. You’re looking for any lingering signs of the water’s visit. This means checking for:
- Discoloration: Water can leave behind dark spots or stains, especially on lighter woods.
- Surface Changes: Does the finish look dull, hazy, or warped in spots?
- Mold or Mildew: Give a sniff test. Any musty smells mean you need to investigate further. Even a tiny bit of mold needs to be dealt with properly.
For cleaning, start with a wood floor cleaner that’s safe for your finish. You want something that will lift dirt and any residue without damaging the wood further. If you had clean water, a good wipe-down might be all you need. For anything less clean, you might need a disinfectant, but always test it in an inconspicuous spot first. If you find mold, you might need to look into professional mold remediation services, especially if it’s widespread. Remember, dealing with mold is serious business.
Don’t rush this assessment phase. A thorough check now prevents bigger headaches down the road. It’s better to find a small issue and fix it than to cover it up and have it reappear later.
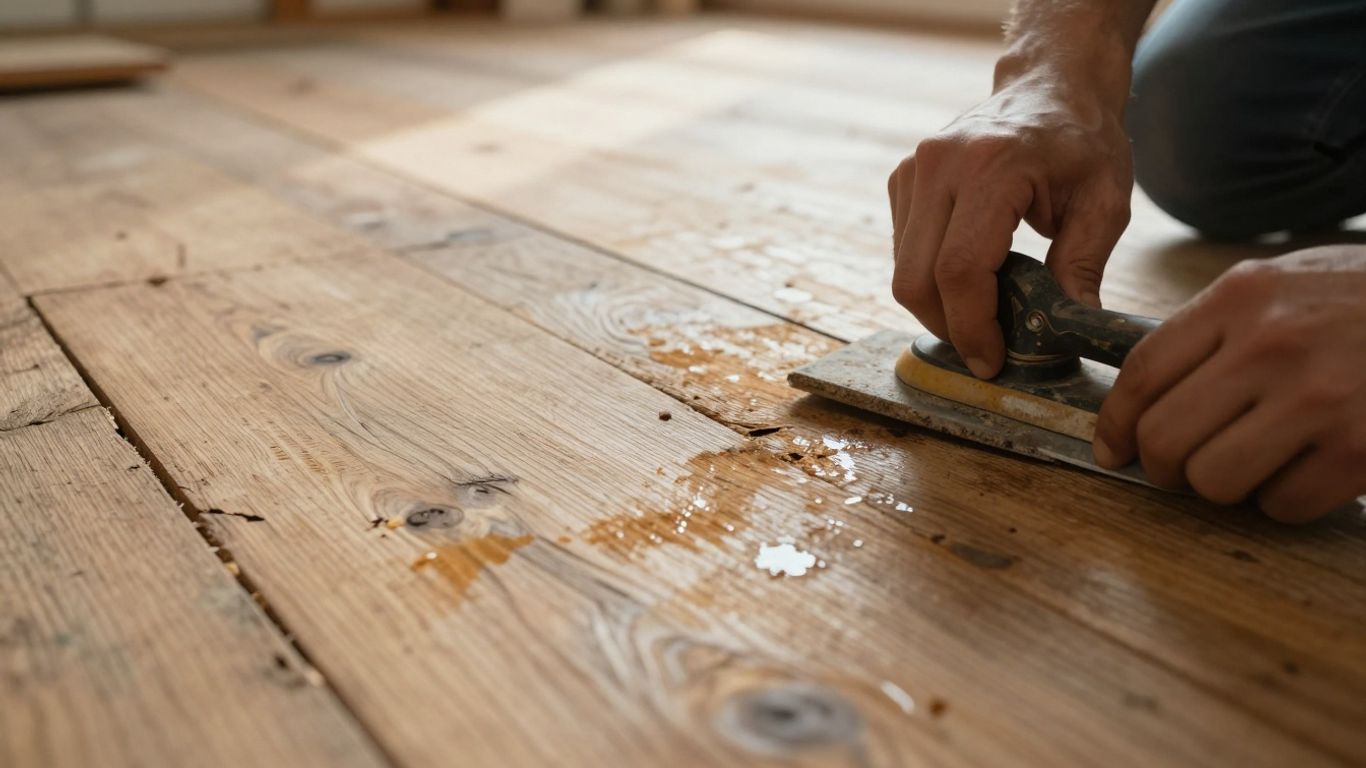
Surface Restoration: Sanding and Staining
If the water left its mark on the surface – think water spots, dull patches, or minor scratches – sanding is your next step. You’re not necessarily trying to level the whole floor unless it’s severely warped, but rather to remove the damaged top layer. Start with a fine-grit sandpaper, maybe around 120-150 grit, and work your way up if needed. You want to be gentle here; you’re not trying to remove a ton of wood, just the affected finish and discoloration.
After sanding, you’ll need to clean up all that dust. Seriously, get every last speck. Then comes staining, if necessary. If the water stripped the color or left uneven patches, you’ll want to apply a stain that matches your existing floor as closely as possible. This can be tricky, so patience is key. You might need to do a test patch in a closet or under a rug to get the color just right. If the damage was only to the finish and not the wood color itself, you might be able to skip the stain and go straight to refinishing.
Applying Protective Finishes for Longevity
This is the grand finale, the part that seals the deal and protects your hard work. Once your floor is clean, sanded, and stained (if you stained it), it’s time for a new protective finish. Polyurethane is the go-to for most wood floors because it’s durable and offers good water resistance. You’ll want to apply thin, even coats. Trying to slap on a thick coat usually leads to drips, streaks, and a less-than-perfect finish. Follow the manufacturer’s instructions for drying times between coats – this is super important. Rushing this step can ruin the whole job.
Most projects will need at least two, sometimes three, coats of polyurethane. Each coat adds another layer of protection against future spills and wear. After the final coat, you’ll need to let it cure properly. This usually takes a few days before you can walk on it normally, and even longer for heavy furniture. Proper drying is key to making sure your floors are ready for whatever life throws at them next. Taking your time here will pay off in the long run, giving your floors a new lease on life and making them more resilient for the future. If your floors are looking really rough, sometimes professional refinishing is the way to go, especially if you have older, solid hardwood floors that can handle it.
Preventing Future Water Damage to Your Wood Floors
So, you’ve gone through the whole ordeal of dealing with water damage on your wood floors. It’s a pain, right? The good news is, most of the time, you can stop it from happening again. It just takes a little bit of regular attention and some smart moves.
Regular Maintenance and Inspection Routines
Think of this like giving your floors a regular check-up. You wouldn’t skip your own doctor’s appointments, so don’t skip your floors’! A little looking around every so often can catch small issues before they turn into big, wet problems.
- Monthly Checks: Take a quick look around appliances that use water – your dishwasher, washing machine, refrigerator with an ice maker, and sinks. See any drips? Feel any dampness under them? Check around toilets and tubs too. It’s also a good time to peek at any pipes you can see, especially under sinks.
- Quarterly Deep Dive: Every few months, give your floors a good clean. While you’re at it, check the finish. Is it still looking solid, or is it worn down in spots? Worn finishes let water in. Also, take a look at your windows and doors where they meet the floor. Any gaps letting moisture in?
- Annual Professional Tune-Up: It might be worth having a pro give your plumbing and HVAC system a once-over once a year. They can spot issues you might miss, like a slowly leaking pipe or condensation problems in your air ducts. Checking your roof and gutters annually is also smart, as leaks there can eventually find their way down.
Keeping an eye on things regularly is your first and best defense. Small leaks don’t stay small forever, and catching them early saves a lot of headaches and money.
Controlling Indoor Humidity Levels
Wood is a natural material, and it reacts to the air around it. Too much moisture in the air, and your wood floors can swell. Too little, and they can shrink and crack. The sweet spot is usually between 35% and 55% humidity.
- Use a Dehumidifier: Especially in damp areas like basements or during humid seasons, a dehumidifier can make a big difference. You can get portable ones or even whole-house systems.
- Ventilate Smartly: Make sure your bathrooms and kitchen have good ventilation. Use exhaust fans when you’re cooking or showering. If you have a whole-house humidifier/dehumidifier system, make sure it’s working correctly and set to the right levels.
- Monitor with a Hygrometer: These are inexpensive little gadgets that tell you the humidity level in your home. Keep one in a main living area to get a good idea of your indoor climate.
Proactive Measures Against Water Intrusion
Sometimes, you just need to be a step ahead. Think about where water could come from and take steps to block it. Replacing old appliance hoses is a simple but effective way to prevent a burst hose disaster.
- Appliance Hose Check: Rubber hoses on washing machines and dishwashers can get brittle and crack over time. Swap them out every 3-5 years, or consider upgrading to braided stainless steel hoses, which are much tougher.
- Seal Gaps: Look for any small cracks or gaps where water lines enter your home or go through walls. Seal them up with caulk or appropriate sealant to stop water from seeping in.
- Water Shut-Off: If you’re going away for an extended period, like a long vacation, consider shutting off the main water supply to your house. It’s a bit of extra effort, but it can prevent a major flood if something goes wrong while you’re gone. You can find more tips on how to deal with water damage if you ever need them.
Wrapping Up Your Floor’s Comeback
So, dealing with water on your wood floors is definitely a headache, but it’s not always the end of the world. We’ve gone over how to tackle it, from figuring out if you can DIY it to knowing when it’s time to call in the pros. Remember, acting fast is super important, and sometimes, even when things look bad, a little bit of work can bring your floors back to life. Keep an eye on your floors, do a little regular upkeep, and hopefully, you won’t have to deal with this again anytime soon. But if you do, you’ve got a better idea of what to do next.
Frequently Asked Questions
How can I tell if my wood floors are water damaged?
You might notice your wood floors look stained, have dark spots, or start to buckle, cup, or warp. Sometimes, the boards may feel soft, or you might smell a musty odor. If you spot any of these signs, there’s a good chance your floors have water damage.
What should I do first if my wood floors get wet?
Start by making sure it’s safe—turn off electricity in the area if there’s a lot of water. Next, stop the water source if you can, like shutting off a leaking pipe. Remove as much water as possible using towels, a mop, or a wet vacuum. Move rugs and furniture out of the way, and take photos of the damage for your insurance.
Can I fix water-damaged wood floors by myself?
You can try to fix your floors yourself if the water was clean, the damage is only on the surface, and you act quickly (within a few hours). Use fans, dehumidifiers, and a moisture meter to dry the area. If the boards are only a little stained or the finish is damaged, you might be able to sand and refinish them. But if the boards are swollen, warped, or you smell mold, it’s best to call a professional.
When do I need to call a professional for water-damaged wood floors?
Call a professional if the water was dirty (like from a flood or sewage), the floors have been wet for more than two days, the boards are buckling or separating, or you notice a strong musty smell. Also, if the subfloor is wet or you see mold, don’t try to fix it yourself.
How long does it take to dry out wood floors after water damage?
It usually takes 3 to 7 days to dry out wood floors, but it can take longer if there was a lot of water or if the subfloor is wet. You need to keep fans and dehumidifiers running the whole time and check moisture levels every day.
How can I stop water damage from happening again to my wood floors?
Check your home often for leaks, especially around sinks, toilets, and appliances. Keep your home’s humidity between 35% and 55%. Use rugs in areas that get wet, like by doors and sinks. Make sure your floors have a good protective finish, and fix any leaks or drips right away.